outer space cake (i’ve affectionately named it Roger Wilco)
September 7, 2012
Ok. My geek is showing. If you don’t understand that reference, don’t bother googling it, it’s lame.
This is a cake I did for a co-worker’s son. His birthday was clearly themed. I had done little planet cupcakes for him a week prior but didn’t get any pictures. Generally things I do on week nights go un photographed. It’s either incredibly late and dark out by the time I’m done or the next morning I’m so groggy I leave the house without my camera.
To make up for it I took step by step pictures of this cake. Step one: blue icing. The color of the icing didn’t really matter since I was going to cover it with fondant anyway (which is a shame might I add, this was a pretty evenly iced cake, they don’t all turn out so well) but I thought blue was most space like and it was for a little boy. So.. blue.
Step two: galaxy effect. That gallon of left over silver airbrush paint came in handy for this Milky Way inspired spray. Not too shabby. Looks a lot less dolphin blue when applied to black as opposed to white. Duly noted.
On to making planets. SUPER fun. They could also double as marbles I suppose. The only incident with this was for some reason I thought Saturn’s ring wouldn’t hold itself so he sort of turned out looking like a sad hamburger. I may have been the only one who noticed, but I would say I would definitely do that one little part differently next time!
Add the birthday boy’s name and BOOM, space cake!
wild wedding cake
August 21, 2012
Yea, you read it right. That’s a wedding cake.
This cake took nearly 6 months of planning, 3 days to make, and lots and lots of prep work before the wedding. The bride wanted “deco whimsy” so that’s what we did, frog toppers and all. It was also my first time tinting fondant with an air brush as opposed to integrated color. The results were stunning, the cobalt blue and orange were spot on, however the blue off spray got EVERYWHERE. I mean, all over the kitchen, the hardwood floors in the family room, clear down the hall on to the bathroom sink everywhere, I’m still noticing it on towels when I clean and I made this cake back in April. Note: would not recommend indoor use of air brush.
I bought the flower molds off Etsy, and they worked really well. I pressed a ton of white fondant in the molds and then air brushed those as well which really helped match the colors (and it was really fun). You can’t see it very well but the middle layer and detail on the first layer of the cake is actually silver as opposed to white as it appears. I bought silver air brush paint but when applied heavily it turns into a really pretty dolphin blue (this is the best visual I can think of). So it’s lightly dusted on instead. I thought I was going to use a lot more than I did and purchased two big bottles so if anyone would like a super silver, slightly aqua cake, please let me know!
planes, trains and automobiles
August 9, 2012
I’d start quoting the movie but it’s not that kind of blog.
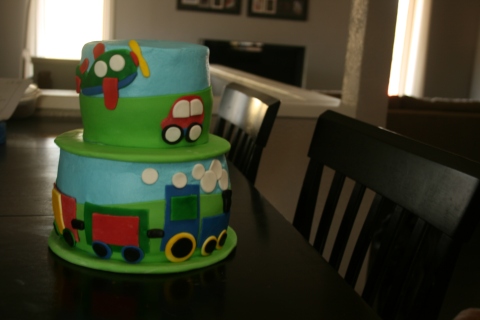
This cake was commissioned by a gal who saw the train cake I did for little Luke a couple posts back. She wanted something really similar but I had seen a cake done for a friend of mine’s son and had been dying to have a reason to make something similar to it so we went with a stacked cake. To meet the desired budget for this cake I only wrapped the bottoms of the cakes in fondant and left most of it in icing. Here’s the completed cake at my house…
It wasn’t a particularly cloudy day as I recall, I have windows and such in my kitchen, including a skylight (oh, fancy). Now here’s what the cake looked like at her place…
I nearly tripped over my own feet when I went to deliver this cake. I was told the doorman would ring me up to where I needed to go which I thought a little odd at the time but quickly forgot while cake making, but when I walked in to the condo at which the party was held this is partly what I saw…
 That window behind the booth, that’s overlooking the Country Club Plaza. I think condos are neat but I’d never been in one so huge and amazing (i’m also a little sad I didn’t stalker-azi her place and take WAY more pictures than necessary just to get interior shots to share, they would have made the story a lot better). Thankfully the elevator didn’t open right up into the condo or the cake wouldn’t have stood a chance, I probably would have dropped it in amazement (interior designer first, cake decorator second).
I guess “b” is also for bowling and birthdays
August 9, 2012
While rifling through my camera and its ancient picture backlog, I found this bowling cake I did for the same gal as the baptism cake I just posted. How fun! Isn’t this a fun family?
It was her husband’s birthday and they were having a bowling party. Not the little kid kind where they use bumpers on the lanes and black lights, the kind where a bunch of grown ups gather and get wasted face on too much beer and not enough pizza and end up puking into a trash bag in the back of their friend’s car while waiting on someone responsible to come pick them up. (wait, what?) The BEST kind of party in my opinion. If you ask me a couple days after the fact anyway.
I have a guest photographer for this one, they snapped shots while I cleaned up and made myself presentable for cake delivery. That’s why these shots look a little more artsy fartsy than what I usually come up with.
Ohhhhhh fancy. And it was REALLY dark by the time I finished up and was in too big of a hurry to properly light anything. Pretend it’s an instagram filter. Even neater!!
b is for baptism (and boy)
August 8, 2012
I recently did a baptism cake for a friend and it reminded me of one I did around this time last year that I never posted. This cake was for the sister-in-law of the monster truck cake recipient. They’ve been a lovely family to bake for, all very easy going and appreciative and the results have been fantastic!
This was a really fun cake with some sparkly accents on the bow to make it a little more special due to the occasion. The baptism cake I did most recently was a cross cake with a million angles and while it turned out just fine, I highly recommend going with a more common shaped cake and making it Baptism in theme as opposed to the more literal translation. Angles and icing don’t really get along. And neither do I or anyone in my general vicinity when making such a cake. Just Saying. If I were to do this again I think I would ombre’ the middle of the cake blue for an even more interesting look when cut!
pinterest [cake] obsession
September 19, 2011
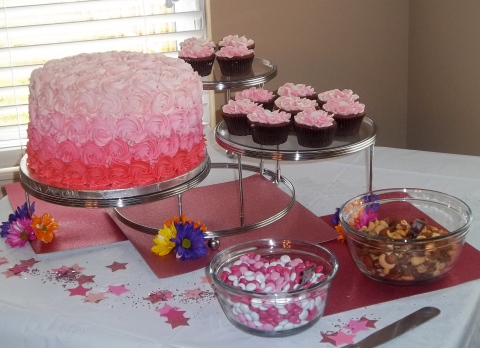
I’m not sure how many of you out there have joined pinterest but it is incredibly addicting. I seem to find cakes I’d like to make daily surfing my app. To the point that I try (and sometimes succeed) in convincing people they need a certain kind of cake for whatever occasion they’re celebrating. Luckily this past weekend a very lovely client was kind enough to oblige my crazy antics and I got to make this…
As previously stated, I am not a master of icing technique, but for some reason rosettes seem to be novice enough for my skill level. This cake was actually three layers and I was terrified it was going to be too heavy and cave in on itself with the weight of this much icing (like the gnome cake did when I attempted to make it three layers).
This cake was for a baby shower, it was a pretty rainy day so the lighting wasn’t great in my first picture so here’s a better one with the whole spread.
The inside of this cake was similar to the outside in that it faded in color. Pretty neat effect!
the good the bad and the sweet
July 21, 2011
For the past couple of weekends I have just been making whatever strikes my fancy at that time. Most recently I made a delicious cake I found on one of my favorite blogs (recipe found here: http://www.mycakeschool.com/blog/page/3/) It turned out amazingly well and was really simple to make/decorate. I baked it Friday night and it only took me about an hour Saturday morning to make the frosting and ice the cake. SUPER easy margarita cake (booze not included).
More importantly some would say, my younger sister just turned 24 this month. I had been looking for an excuse to make someone cake pops and she always makes for a great guinea pig on account of her brutal (some would say constructive) honestly. This is how they turned out:
They look ok in the picture but… this must be said. The babycakes cake pop maker sold in some department stores is… well… lousy. I mean talk about a piece of crap, I don’t consider myself a chef but I do know how to work a toaster, oven, mixer, etc. These cake contraptions are sold as fancy waffle irons, one would assume to be idiot proof, right? I am not an idiot. I could not use this stupid appliance. The batter is either not enough or too much. The pops either aren’t round or there is batter all over the iron and everything cooks stuck together. I threw away at least half of what I made, if not more…
THEN bakerella fails to mention that food coloring +melted candy wafers = concrete. Awful first try at this I would say. A) I recommend using the original recipe for pops found here: http://www.youtube.com/watch?v=JpIifr0VOxY B) I will have to experiment with various dipping substances because as you can see, I have the stinking book, I followed the directions exactly, the candy was not a lovely consistency for dipping as shown in the picture instructions. Can you see how not round these balls are? And how overdone the cake looks on top? Please DO NOT waste your money on this maker. Or, if you must, buy it, use it and see for yourself, then take it back (to Kohls because their return policy is amazing) as I did.
In an effort to not end on something sour, I thought I would share a note we received in the mail the other day. Of course he exaggerates, he was by far everyone’s favorite thing at said graduation party, but I thought it incredibly kind and Kent got a kick out of the shout out. To impress a teenager is not always, as some know, an easy feat. Go team!
red, white + blue(berries)
July 13, 2011
I seem to be getting into a very bad habit of post delaying. I promise to be better! This particular project was from 2 weeks ago, we went to the Ozarks for the Fourth of July and I needed something fun and portable to do that didn’t require me toting my mass amount of cake supplies to and from the lake house.
In order to do this, I bought all my supplies from the store, a pre-made angel food cake, cool whip, and berries. I filled this cake’s center with another angel food cake cause I thought it easier to decorate, not to mention that meant more cake to snack on, no one seemed to complain.
Everyone has seen the typical flag cake with blueberries and strawberries. I went online and found a really neat picture of a round cake with a blueberry star and red raspberry background and decided it was adorable, quick and easy. I used a regular spatula to cover the cake in cool whip, then popped it back in the freezer for a few minutes before I started adding berries.
It took a couple of turns in and out of the freezer to keep the cool whip at the right temperature, soft but not melting all over the place. Unfortunately my raspberries had gone bad and we had to sub them out for… you guessed it, strawberries.
A big thanks to my aunt, Judy Byrd for taking pictures for me. It was sort of nice not having to stop to shoot and look how well she did! I admit to being a little disappointed that my raspberries didn’t survive the trip but this cake was delicious regardless.
garden gnomes + woodland fairies
June 28, 2011
This past weekend was a really fun example of what happens when creative people collide. I have to say, making cakes for friends is one of my favorite things to do, but when my friends happen to be throwing an amazing party and allow me be a part of it, it makes for an even more rewarding experience.
One of my favorite coworker’s daughter turned 3 this past week and he and his wife put on one of the most enviable spreads I’ve ever seen, check out this birthday girl’s enchanted forest!
Her mom actually made all of these little seats, aren’t they adorable! There were bottles of fairy dust, chocolate bird’s nests, a crafting table, the works!
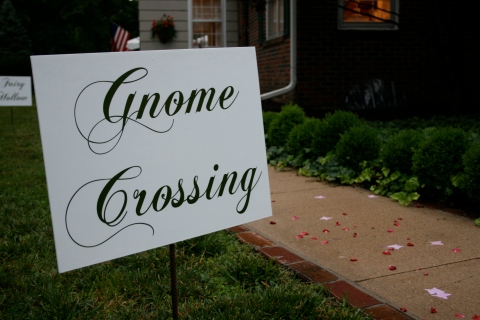
One of the neatest things about making a cake for these particular friends is not only are they repeat clients but I even got to have a say in what cake was made this year. I just googled gnome cakes for inspiration, we made a few changes to an image and came up with this…
This little gnome was fully equipped with his own toadstool forest as well as a tiny corn cob pipe! (We have affectionately been referring to him as David the gnome. Obviously pre beard / Nickelodeon deal)
This party was so fabulous it made another blog recently! Melanie of www.yourstylescout.blogspot.com/ is actually a neighbor of the birthday girl and was kind enough to let me use a party pic she took, thanks Melanie!
surprise sundaes!
June 19, 2011
We had a family gathering this weekend to celebrate June birthdays. I had seen this particular cake idea on one of my favorite blogs (my cake school – link to the right) and decided this would be the perfect time to try it out!
This was one of the quickest, easiest and most fun cake creations I have ever done! I was giddy the entire 2 hours it took to complete, and that time includes baking!
While my cupcakes were in the oven I whipped up some icing and divided it up to make my ice cream colors. While the cupcakes were cooling I shaved off the back of my waffle cones and stuck them to my carrier with extra icing. It doesn’t happen often, but this was so easy I actually had all of my components laid out before I started assembling. I thought it remarkable enough that I had to photo document it!

After my cupcakes were cooled, I stuck them to my carrier in a stacked ice cream scoop pattern. The example showed the cones being slightly larger than what I bought – so the first cupcake actually sits down in the cone further but once it was all put together you couldn’t really tell the difference.
Starting from the bottom, I iced my way up each sundae, leaving the small chocolate additions for last. Add toppings and names if you so wish and voilà! The perfect summer treat that won’t melt or puddle on a hot day!


